
BlSON is now Elerein!

How to select the right floor pads for floor burnishers

August 4, 2026

Elerein-knows-everything-about-cleaning-equipment
Picture of Elerein Yanki
Elerein Yanki

Hi, I am Yanki, the founder of bisonclean.com. I have been in the cleaning equipment field for more than 5 years now, and the purpose of this article is to share with you the knowledge related to cleaning equipment from a Chinese supplier's perspective.

Table of Contents

A floor burnisher can quickly restore a dull floor to a clean, professional finish. However, if the results are poor despite using the correct technique, the problem is often the floor pad rather than the machine.

Choosing the right floor pad is essential for achieving the desired finish, improving efficiency, and maintaining the floor’s condition over time. Using the wrong pad can leave swirl marks, reduce shine, damage the floor, and waste time and materials. It can also create surface damage. In this blog, we explore how to select the right floor pads for floor burnishers, covering colors, materials, and machine compatibility for flawless results.

how-to-select-the-right-floor-pads-for-floor-burnishers

Understanding floor burnisher pads

What floor pads for burnishers do

Floor burnisher pads are designed to work with electric and battery-powered machines to polish and maintain finished floors. They use controlled pad pressure to smooth the floor surface, remove light scuffs, and restore a clean, reflective shine without removing too much of the floor finish.

Not all burnisher pads perform the same function. Some maximize gloss, while others are intended for light maintenance, spray buffing, or restoring high-traffic areas. They also vary in aggressiveness, so select the pad based on the floor’s condition and the desired finish.

Why pad selection matters

The floor pad plays a greater role than machine speed because it directly transfers the machine’s energy to the floor. Even if the burnisher is operating correctly, using the wrong pad can reduce shine, leave swirl marks, increase pad wear, and raise maintenance costs.

Choosing the correct pad improves gloss, pad life, labor efficiency, and the overall appearance of the floor.

Decoding the burnishing pad color and material

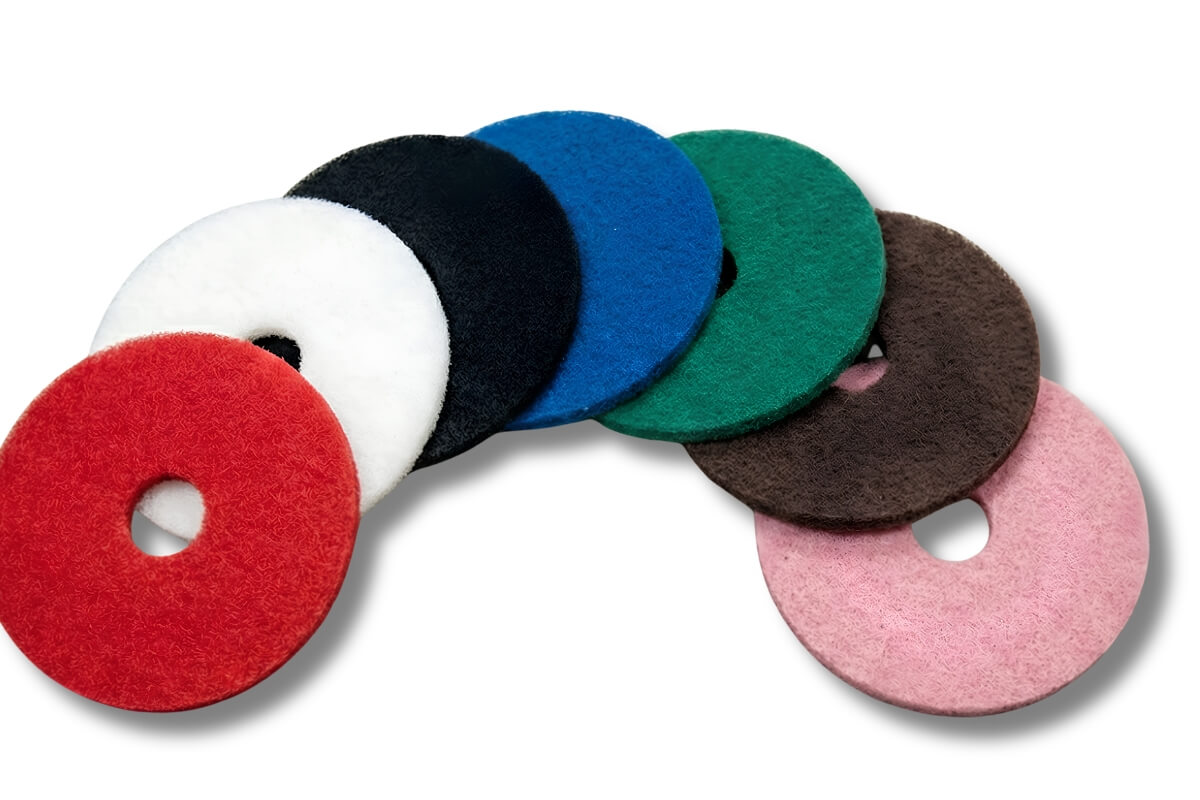
Pad color as a general guide

  • Tan or natural – Designed for electric burnishing and dry buffing on standard machines like the Elerein E-17.
  • White – Suitable for light-duty polishing and spray buffing.
  • Red – Used for light scrubbing and spray buffing on softer floor finishes.
  • Pink or beige – Intended for specialty high-speed burnishing applications.

While pad color serves as a helpful guide, performance can vary significantly between manufacturers. Always review product specifications, including intended use, recommended machine speed, surface compatibility, and manufacturer recommendations.

Synthetic polishing pads (white, aqua, and pink)

Synthetic pads in white, aqua, or pink are designed to enhance gloss rather than correct the surface. They are suitable for daily burnishing on soft floor finishes, removing light soil and minor haze while maintaining the protective finish.

  • Best for: Daily maintenance, well-maintained finishes, moderate-traffic areas, and restoring light shine.
  • Usage tip: For spray buffing, pair white synthetic pads with a maintenance solution to remove heel marks and light scratches without dulling the finish.

Natural hair and blend pads (hogs hair)

Combining natural animal hair with synthetic fibers, hog hair and hair-blend pads provide a firmer polishing surface than standard synthetic pads, making them ideal for medium- to hard-floor finishes.

  • Best for: Achieving a high-gloss “wet look” finish, restoring traffic lanes, treating distressed areas, and reviving slightly worn finishes.
  • Usage tip: Ensure the floor is completely clean and dry before burnishing — any debris caught under a natural hair pad will leave micro-scratches. For heavily worn areas, test on a small section first.

Specialty and diamond-impregnated pads

Specialty and diamond-impregnated pads are designed for polishing concrete, terrazzo, and natural stone floors. They enable chemical-free burnishing while refining the floor surface. Lower-grit pads provide stronger surface correction, while finer grits improve gloss and produce a polished finish.

  • Best for: Concrete polishing systems, terrazzo and natural stone maintenance, and specialty floor care programs.
  • Usage tip: Start with a lower grit for surface correction, then progress to finer grits for the final polish. Always test on an inconspicuous area to confirm the grit level produces the desired result before proceeding with the full floor.
decoding-the-burnishing-pad-color-and-material

Key factors to consider when selecting floor pads

1. Floor type and finish compatibility

Different surfaces require different pad materials and levels of abrasiveness. Using a pad that is too aggressive can damage the finish, while a pad that is too soft may not produce the desired shine.

  • VCT (vinyl composition tile): Suitable for maintaining shine, restoring gloss, and removing light scuffs.
  • LVT (luxury vinyl tile): Requires soft, non-abrasive pads. Always follow the flooring manufacturer’s recommendations.
  • Concrete floors: Match the pad to the floor coating and desired gloss level.
  • Stone and hard floors: May require specialty pads or different maintenance methods.
  • Hardwood floors: Use mild, non-aggressive pads and avoid burnishing if the wood grain is exposed.

2. Pad grit and abrasiveness

  • Newly finished floors: Use soft polishing or high-gloss burnishing pads.
  • Floors with light scuffs: Choose a moderately aggressive pad.
  • Dull floors: Use pads designed to restore gloss.
  • Heavily worn floors: Burnishing may improve appearance, but recoating or refinishing may be necessary.

3. Pad material and construction

Pad material directly affects polishing performance and durability — refer to the material guide above for specific recommendations by pad type.

Pad thickness also matters: thicker pads provide more cushioning. In comparison, thinner pads apply greater pressure and generate more heat — an important consideration for 175 RPM burnishers where pad contact pressure drives results.

4. Pad diameter

The pad diameter must match the machine’s pad driver size, such as 17-inch, 20-inch, or 21-inch. Using the correct size helps ensure even polishing and prevents unnecessary wear on the machine.

5. RPM rating and machine compatibility

Always match the pad to your machine’s operating speed.

  • Low-speed machines (175–350 RPM): Use pads designed for steady contact.
  • High-speed machines (1,000–1,500 RPM): Require heat-resistant pads.
  • Ultra-high-speed machines (2,000–3,000 RPM): Require pads designed for high heat and friction.

Machine weight and downward pressure also affect pad performance, especially on heavier and battery-powered burnishers.

rpm-rating-and-machine-compatibility

6. Maintenance frequency and traffic levels

Choose the pad based on maintenance frequency and foot traffic. Use softer pads for daily maintenance, slightly more aggressive pads for periodic restorative burnishing, and less abrasive pads for regular upkeep in high-traffic areas.

7. Pad quality and manufacturer

Higher-quality pads provide better gloss, longer service life, and more consistent performance. Choose products from reputable manufacturers that provide clear specifications, speed ratings, and compatibility information.

Practical tips for getting the most out of your floor pads

  1. Install and center the pad correctly. Start with a clean pad driver to ensure the pad sits flat. Align the center hole with the driver, press the pad evenly into place, and check that it rotates smoothly before operating the machine. Proper centering helps prevent vibration, uneven pressure, and premature pad wear.
  2. Rotate and flip pads regularly. Rotate and flip pads regularly to promote even wear and extend pad lifespan. Alternate both sides during use and rotate the pad’s position when reinstalling it. Replace the pad if you notice edge fraying, permanent compression, or uneven thickness.
  3. Clean and store pads properly. Clean pads after each use to remove dirt and finish residue. Rinse synthetic pads with water and allow them to air dry flat. Handle natural fiber and blended pads carefully — avoid harsh chemicals and excessive wringing. Store all pads flat in a clean, dry area away from direct sunlight.
  4. Know when to replace a pad. Replace the pad when it no longer delivers consistent results. Common signs include glazing, frayed edges, compressed fibers, buildup of finish residue, reduced gloss, increased machine drag, or the need for extra passes. Keep separate pads for different tasks, label them clearly, and train staff on when to use each type. A simple replacement schedule prevents worn pads from compromising floor appearance.

Conclusion

Choosing the right floor pad is essential for achieving the best burnishing results. Matching the pad to the floor type, finish hardness, machine RPM, and maintenance goal helps improve shine, reduce labor, extend the life of the floor finish, and deliver consistent results.

As a professional floor burnisher manufacturer, Elerein builds machines designed for consistent performance and low maintenance, ensuring you get the most out of every job. We understand what dealers need — a competitive price-to-performance ratio and reliable parts availability that safeguard your long-term profit margins. Partner with Elerein to add a proven, dependable burnisher to your lineup.

FAQs about floor pads for floor burnishers

Burnishing pads polish and enhance the gloss on finished floors without removing the coating, operating at 175 RPM or above. Scrubbing pads use more abrasive material to remove embedded dirt, stains, and old finish.

Swirl marks usually come from an uneven pad surface, excessive abrasiveness, or dirt trapped between the pad and floor. Use a finer pad and ensure the floor is clean before burnishing. A centered, clean pad on a clean floor gives the most consistent finish.

Glazing happens when floor finish or dirt builds up into a hard layer on the pad surface, reducing friction and performance. Rinse synthetic pads with water and air dry flat. If the pad stays glazed after cleaning, replace it.

Related Posts

To Be Our Agent

We will contact you within 1 working day.

Ask For A Quick Quote

We will contact you within 1 working day.